|
By Joanne K., Pitt County Extension Master Gardener Volunteer With spring blooming all around us, what gardener doesn't want to continue such a colorful display in their yard all summer? While gardeners like to plant perennials for their beautiful color, shape, and longevity, most perennials only bloom for a specific time. To enjoy garden color all summer, add annuals to your planting mix, whether in the ground, in containers, or in hanging baskets. To really extend your color and get the most bang for your buck, select colorful annuals with staying power. At JC Raulston Arboretum in Raleigh, their trial gardens are planted yearly with assorted annuals to determine which ones will do best in the heat and humidity of North Carolina summers. For full-sun beds, some of their recommendations include Calibrachoa x hybrida (Million Bells), Celosia spp. (Cock's comb), and Cuphea ignea (Firecracker Plant). 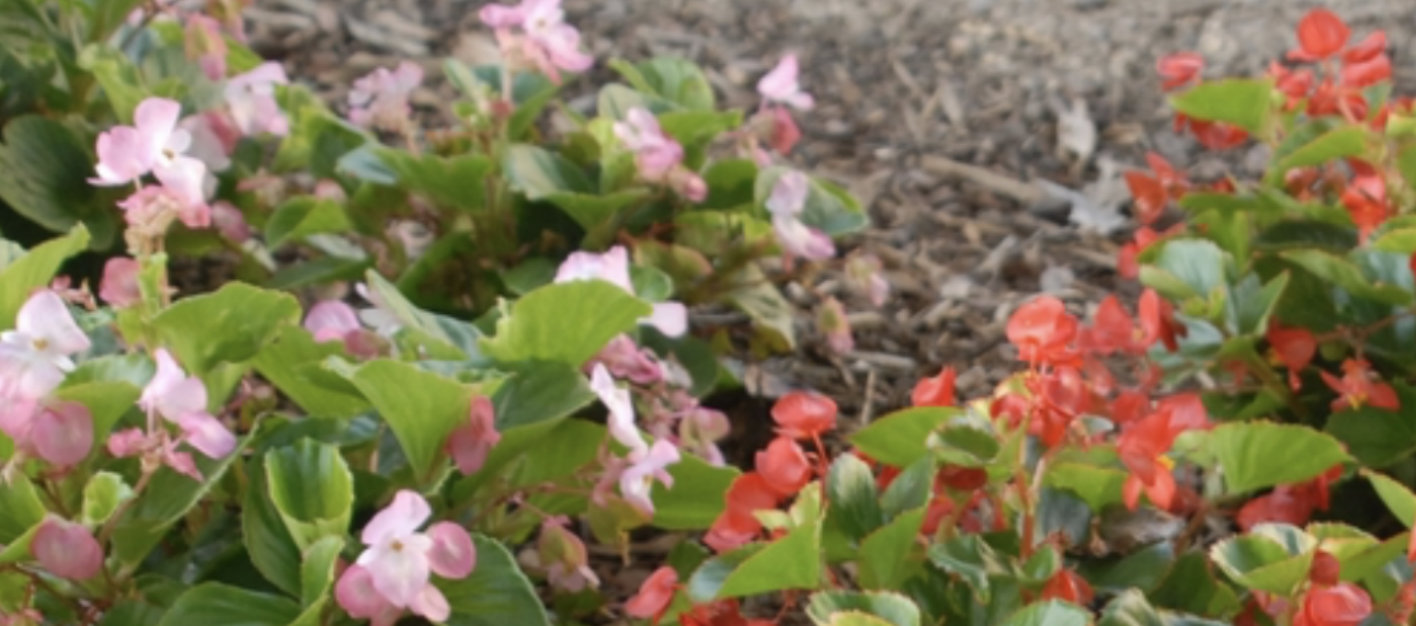 Begonias also grow well in pots and indoors. Flower Form Jim Robbins CC BY-NC-ND 4.0 Calibrachoa flowers appear in blue, gold/yellow, orange, pink, purple/lavender, red/burgundy, variegated, and white. Celosia flowers come in gold/yellow, orange, pink, and purple/lavender. Both plants like to be on the dry side and don't need deadheading. Both are drought and heat tolerant. With its bright orange, red, yellow, and purple flowers lasting into fall, Cuphea is a favorite of pollinators such as bees, butterflies, and hummingbirds, attracted to. It likes well-watered, well-drained soil, and is somewhat drought-tolerant.
Two picks for part shade are Begonia (Semperflorens-Cultorum Group) (Wax Begonias) and Impatiens walleriana (Impatiens). Begonia flowers come in shades of gold/yellow, pink, red/burgundy, and white, with lots of leaf color variation. Begonias are heat- and drought-tolerant, and deer generally avoid them.
Unfortunately, since deer love Impatiens, it’s best to avoid planting them if your garden is a salad bar for deer. Impatiens tolerate humidity but will wilt in hot, dry spells. With their orange, pink, purple/lavender, red/burgundy, and white blooms, Impatiens also attract pollinators including butterflies and hummingbirds. Leaf color is another option for shady areas. Caladium cultivars come in many colorful combinations of pink, red, green, and white, and are summer stalwarts. They prefer a rich soil and constant moisture. For more information on growing these plants, go to the NC Extension Gardener Plant Toolbox.
0 Comments
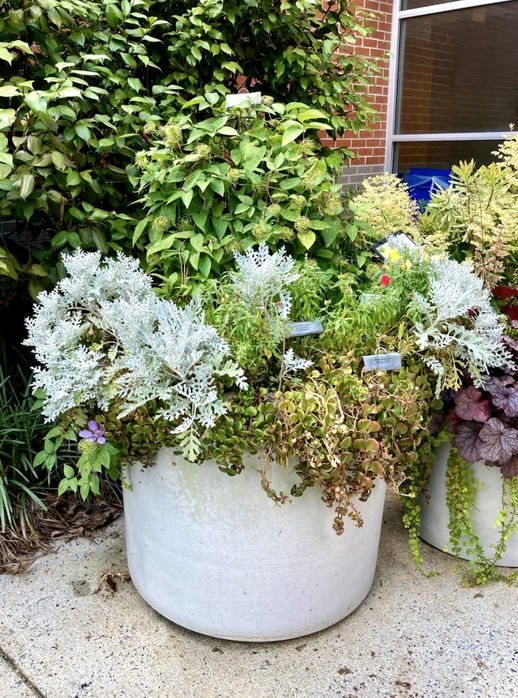
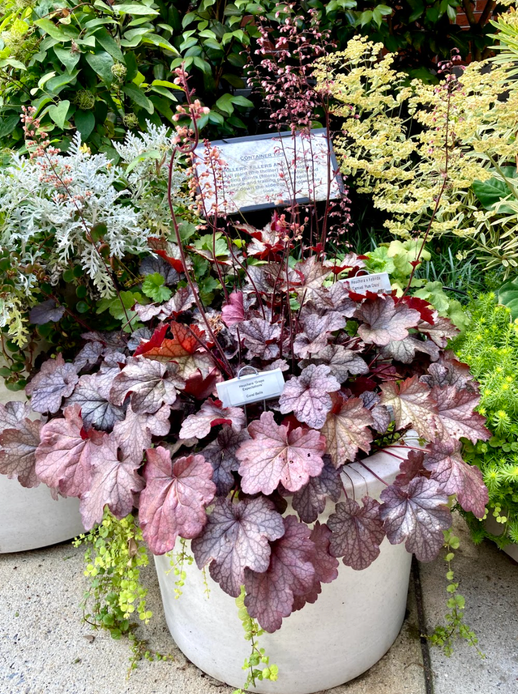
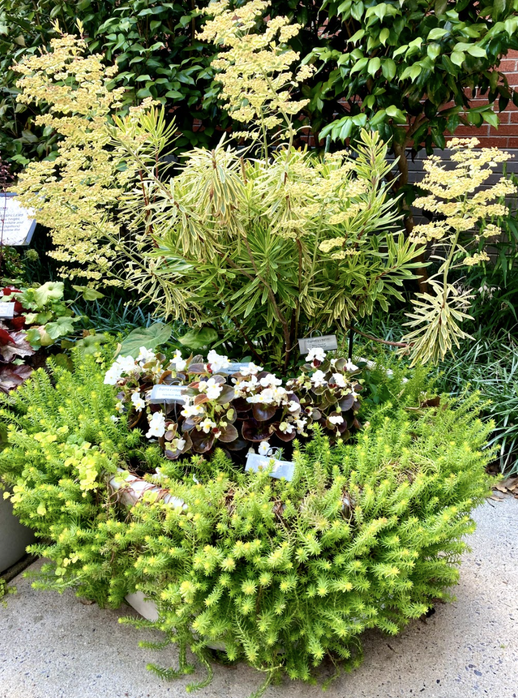
Story by Joanne K. and Ann H., NC State Extension Master GardenerSM Volunteers. All photos by Ann Hamze, CC BY 4.0. With local nurseries and big-box stores overflowing with colorful blooms and leafy greens, gardeners are ready to create their summer container gardens.
The container gardens featured here were displayed at the Arboretum in the spring and summer of 2023. Other Arboretum container gardens can be seen in front and on the sides of the building and under the green canopy.
We hope that these gardens will inspire you to create your own colorful container garden. And be sure to visit the Arboretum to see what's growing this year! For more information on creating and maintaining container gardens, go to the NC Extension Gardener Handbook. By Joanne K. and John W., NC State Extension Master GardenerSM volunteers When sunny 70+ degree days start popping up in March in eastern NC, gardeners become eager to start digging in the dirt to plant their veggies.
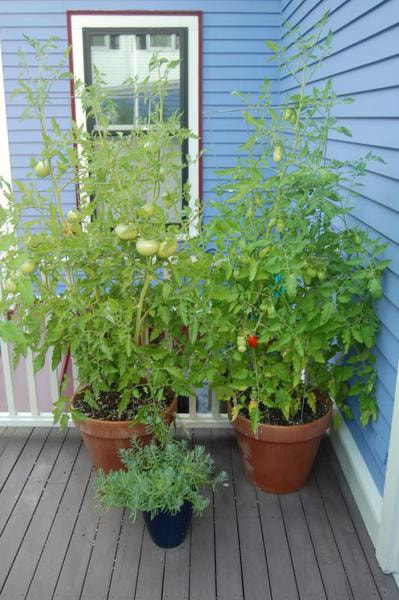
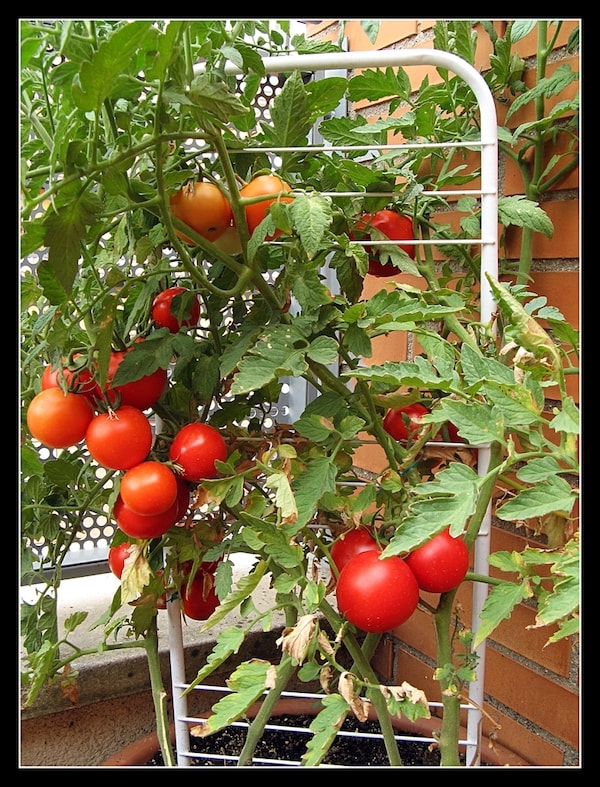
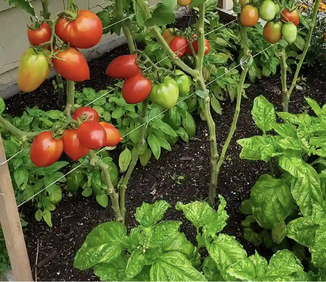
Types of Plants When deciding which varieties to plant, there are two types to consider: 1) Determinate tomatoes grow to a certain height and are good for container planting. The fruit ripens in 3 to 4 weeks and then the plant is done. Most of the disease-resistant varieties are determinate. 2) Indeterminate ones grow from 5 to 20 feet tall, fruiting all season if the climate is favorable. They need a support system such as cages, poles, or trellises to prevent drooping or breaking.
Caring for Your Plants
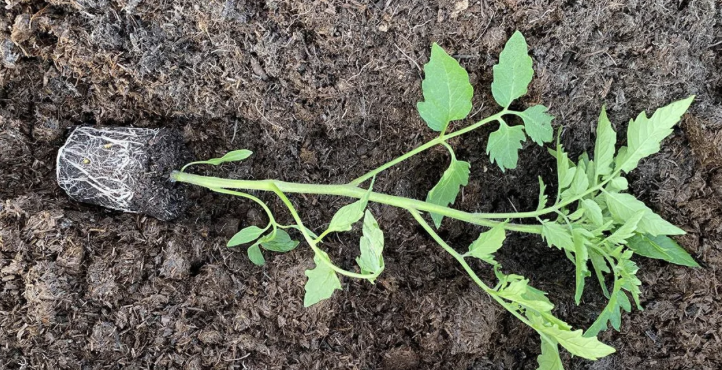
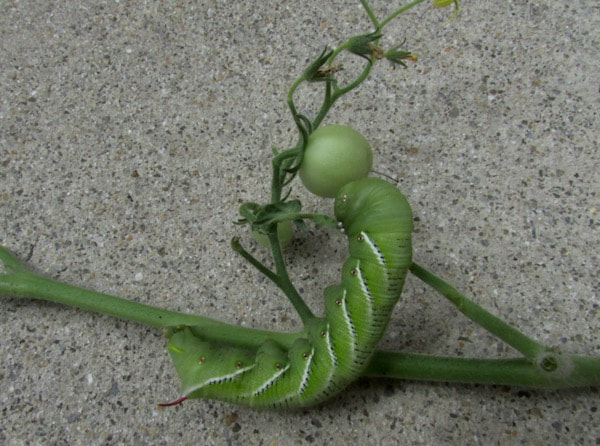
Depending on the variety, tomatoes need anywhere from no support to 15-foot poles. Water when the soil starts to dry out. Drip irrigation is better than overhead to reduce disease problems. Tomatoes need 1" to 1 1/2" of rain or water each week. Do a soil test to determine your fertilizer needs. Use a plant-starting fertilizer solution when putting the tomatoes in the ground. Tomatoes are heavy feeders and will need two to three tablespoons per plant of 8-8-8 or 10-10-10 when the fruit starts to set and every 4-6 weeks afterward. Suckers are the new growth that forms at the axial joint. Removing the suckers encourages fewer but bigger tomatoes. It also allows more air flow between plants and discourages insect and disease populations. Remove suckers by pinching close to the stem with your fingers or cutting with pruners. The suckers can be planted to create new plants. Problems If deer visit your garden, you will need a fence. Birds will usually take one or two pecks in ripe fruit. You can eat around the wound. Squirrels can take large bites out of ripe tomatoes. Rabbits may nibble on small plants, but they generally don't bother larger ones. Turtles like to eat the ripe fruit that they can reach. Using foil when planting deters cutworms. Check for tomato horn worms whose green coloration makes them hard to spot. They can be picked off by hand and squashed. Diseases Unfortunately, tomatoes are susceptible to many types of disease with very few cures. Control methods include: 1. Plant disease-resistant varieties. 2. Cut off the bottom leaves if the problem starts there (Septoria leaf spot). 3. Pull out the problem plant and dispose of it in the garbage. 4. Plant extra plants. 5. Rotate crops so that the same plant is not grown in the same area for 3 to 4 years. Tomatoes, potatoes, peppers, and eggplants are all in the Solanaceae or nightshade family, and should not follow one another in the garden. Other Problems If the plant has all leaves, but few flowers, too much nitrogen fertilizer was used. If there are lots of flowers but few tomatoes, the air temperature is too high. Tomatoes with black ends have blossom-end rot, indicating a lack of calcium in the soil and/or irregular soil moisture. Cracking occurs when the fruit is almost ripe and there is a heavy rain. Try picking tomatoes just as they start to color. Ripen them indoors. For more information on growing tomatoes go to the NC Extension Gardener Plant Toolbox at: https://plants.ces.ncsu.edu/plants/solanum-lycopersicum/ Also check these other NC State Extension links: https://content.ces.ncsu.edu/eastern-north-carolina-planting-calendar-for-annual-vegetables-fruits-and-herbs https://content.ces.ncsu.edu/insect-and-related-pests-of-vegetables/pests-of-tomato https://vegetables.ces.ncsu.edu/tomatoes-diseases/ Joanne K., Pitt County Arboretum E Extension Master Gardener Volunteer As spring bulbs start to bloom, you will also start to see tips of your perennials poking above ground or showing some new growth. Late winter, early spring is a great time to divide your perennials. Plant division allows you to maintain the desired plant size, revitalize its growth, and produce more plants for yourself or to share with fellow gardeners. Division is not needed every year. Many perennials, however, can become too thick after growing for two or three years in the same place resulting in smaller, fewer, or no blooms at all. Other signs that a plant should be divided include a dead center, sluggish growth, or too large for its space.
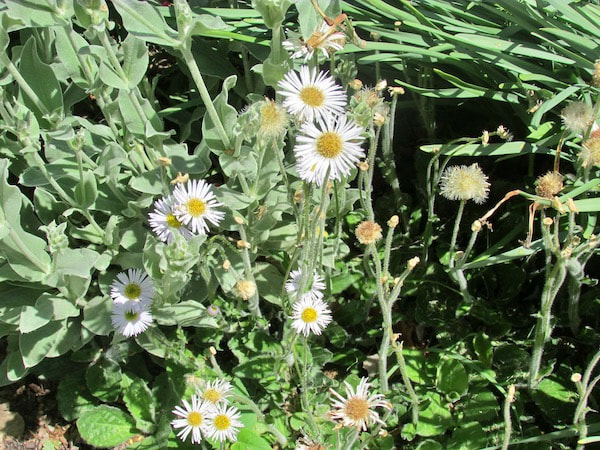
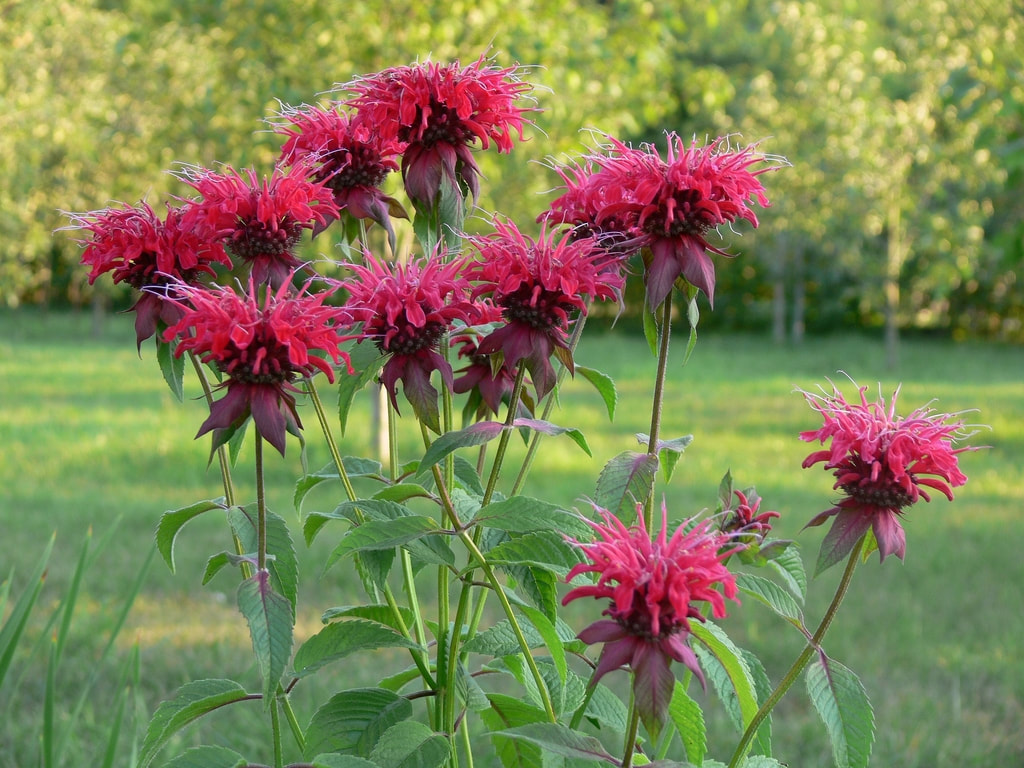
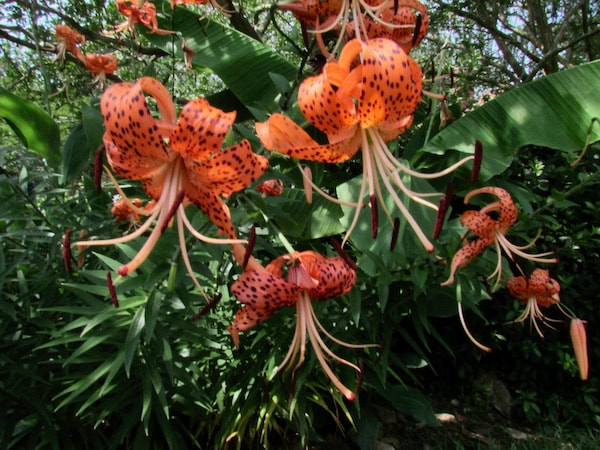
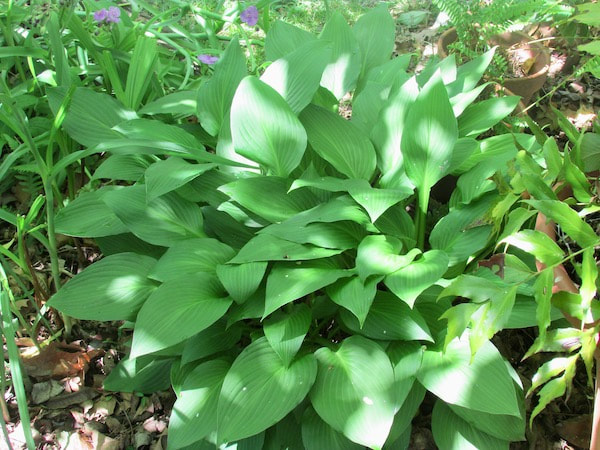
For some plants the root system can be pulled apart by hand such as Asters and bee balm (Monarda). For bigger clumps such as daylilies (Hemerocallis spp.) and Hostas, you may need to use a sharp knife or handsaw to cut between the crowns maintaining a good section of root. Three to five shoots are recommended for each division.
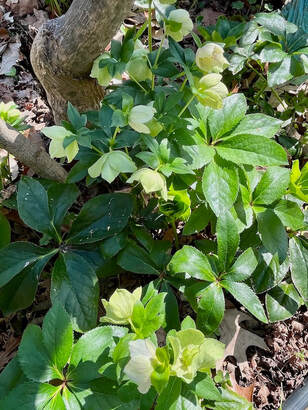
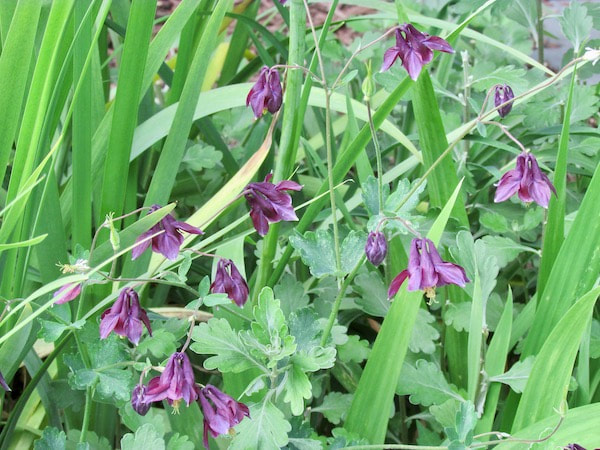
Mature Lenten Roses (Hellebore) are difficult to move. The species spreads easily so digging up and replanting the seedlings will be more successful. Some plants should never be divided such as butterfly weed (Asclepias), columbines (Aquilegia), and indigo (Baptisia). More instructions on how and when to divide perennials can be found at: http://www.clemson.edu/extension/hgic/plants/landscape/flowers/hgic1150.html More information on the individual plants above can be found at the NC Extension Gardener Plant Toolbox at: https://plants.ces.ncsu.edu/ Photo credits:
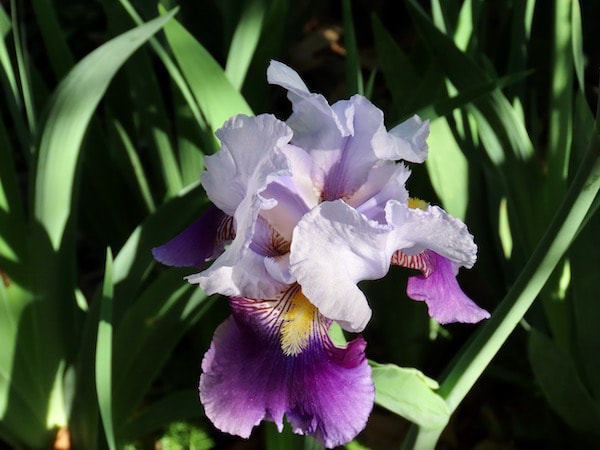
1. Aster, Joanne K. 2. Bee Balm, Monarda—Red tubular flowers Dy-e CCBY-SA 3.0 3. Daylilies, Hemerocallis spp., Joanne K. 4. Hosta, Joanne K. 5. Iris, Joanne K. 6. Lenten Rose, Hellebore, Joanne K. 7. Columbines, Aquilegia, Joanne K. By John W., Cindy C., and Joanne K., Pitt County Arboretum Extension Master Gardener Volunteers What should you do when you walk in your garden and find that something has eaten the cabbage, the tomatoes have black ends, the azalea leaves have been eaten, a plant failed to grow, and dead patches have appeared in your lawn? Most gardeners have run into these or similar problems. Below are resources to help you try to solve your problems. First, carefully look at the plant problem, collecting as much information as possible. The more you know about the problem, the easier it is to find a solution. Here are some questions to consider:
After completing your detective work, you can often solve your problem.
If not, try the following resources: Pitt County Extension Master Gardener Volunteer Info Line: This is a telephone or in-person service staffed on Tuesdays and Thursdays from 10:00 am to noon. Call 252-902-1705 or visit 403 Government Circle, #2, in Greenville. You can also leave a voice mail message at 252-902-1705 describing your problem and how to contact you. Your call will be returned when Master Gardeners are in the office. These gardeners live in Pitt and Beaufort Counties, have completed an NC Extension Service Master Gardening training program, are long-time gardeners, and have usually gardened for many years in this area.
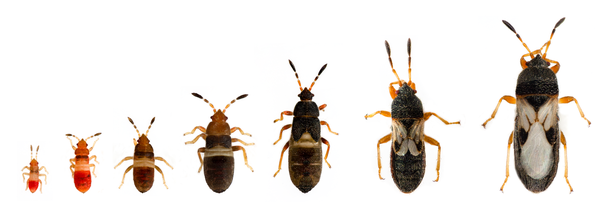
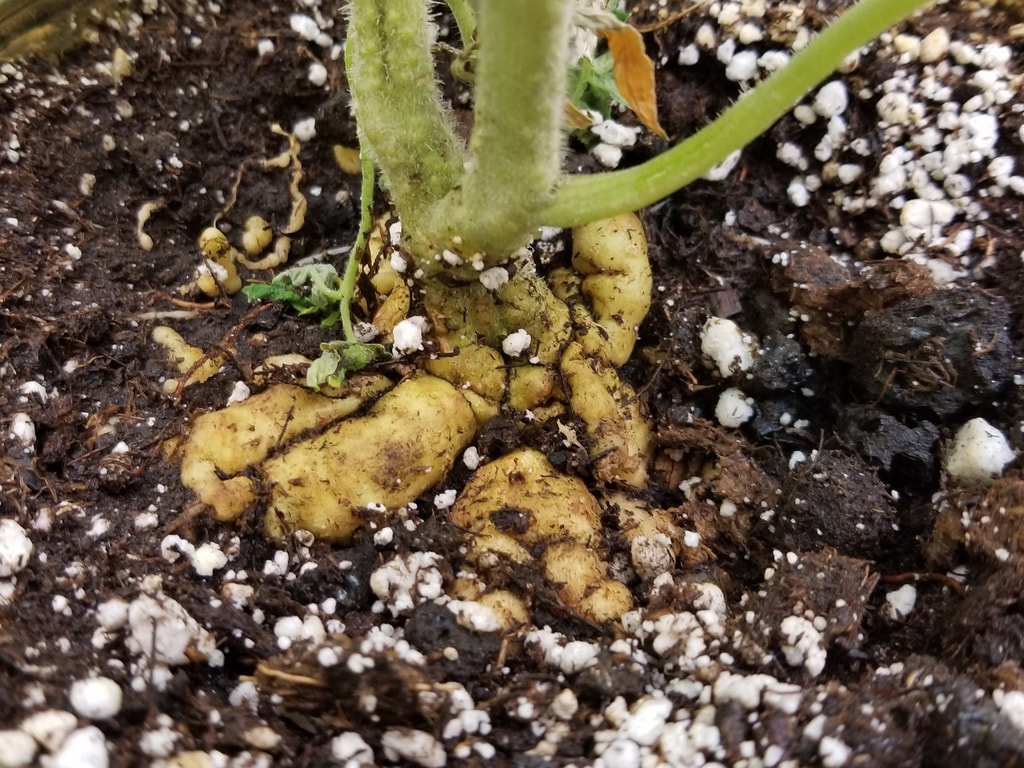
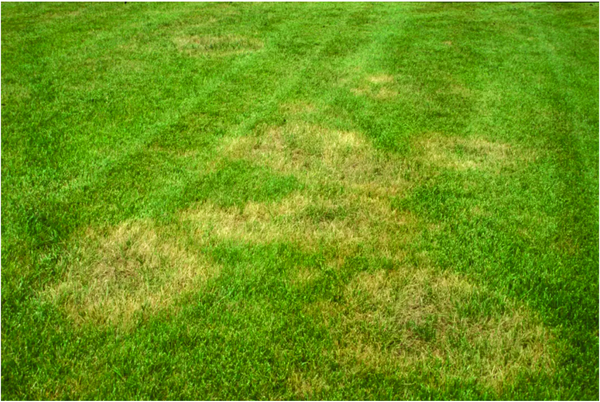
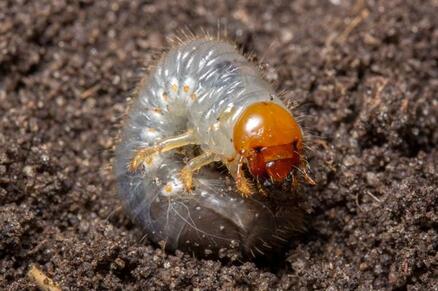
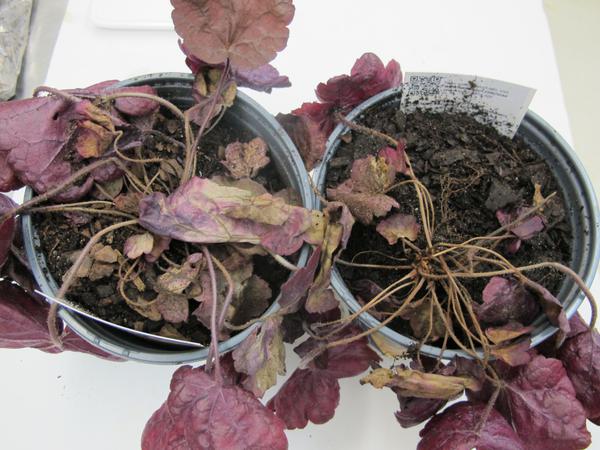
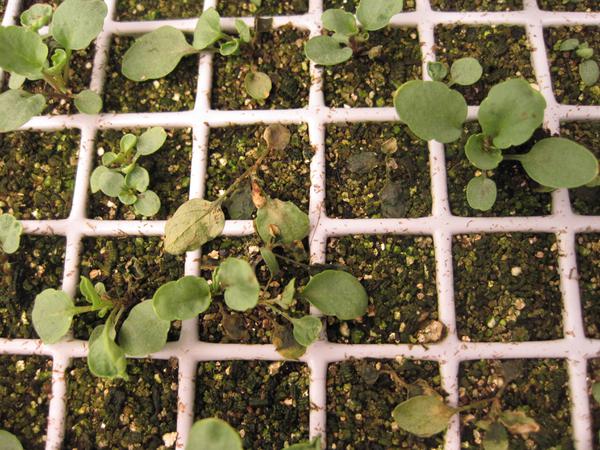
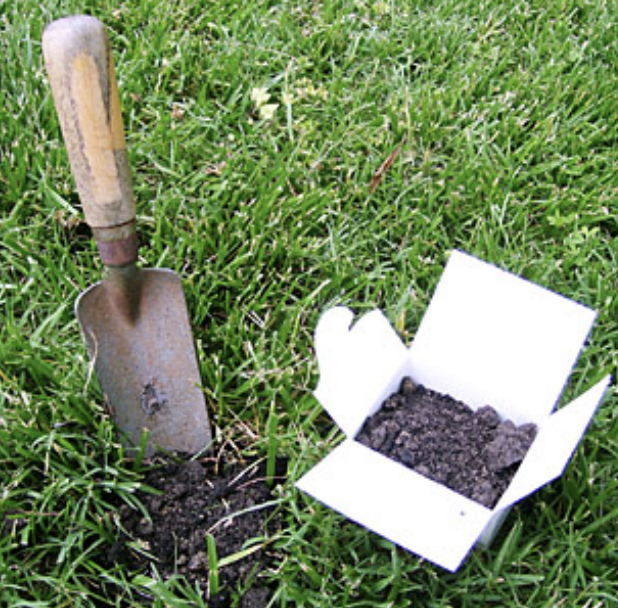
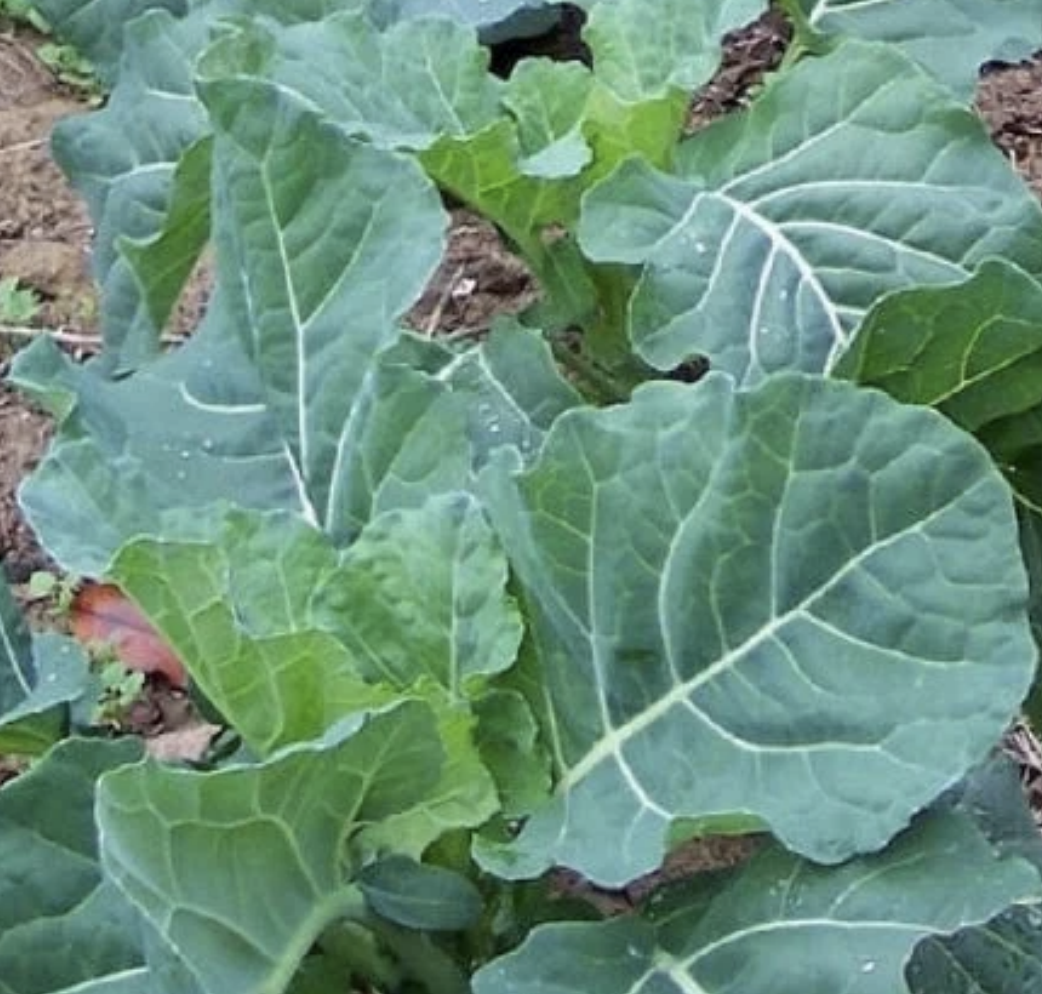
North Carolina State Extension – ces.ncsu.edu NC State Ag faculty and Ag Extension agents provide research-based gardening information. Type your question in the search box for links to articles concerning your question. Type turffiles in the search box for lawn diseases, pests, and maintenance practice questions. Type NCSU turffiles into your search engine to go directly to this site. Clemson University – hgic.clemson.edu Clemson's Home and Garden Information Center offers research-based gardening solutions for home gardeners. Search the categories across the top or use the search box for available articles. Missouri Botanical Gardens – missouribotanicalgardens.org If your plant is growing poorly, this website summarizes the ideal growing conditions for your plant. However, not every plant is in their database. We hope these resources will help you become a better gardener! Photo credits: 1. Chinch bug nymphal instars and adult, D.S Reiland 2. Tomatoes - Root-knot nematode (Meloidogyne incognita) on variety 'Pixie' Scot Nelson Public Domain Mark 1.0 3. Figure 9-36. A brown area on tall fescue grass, NC State Turf Pathology 4. White grub. M. Bertone, NCSU Plant Disease and Insect Clinic 5. Symptoms of root and crown rot on Heuchera, NCSU Plant Disease and Insect Clinic 6. Bacterial leaf spot on geranium, NCSU Plant Disease and Insect Clinic 7. Pansy affected by damping-off fungi, NCSU Plant Disease and Insect Clinic Story by Susann C., Pitt County Arboretum Extension Master Gardener Volunteer 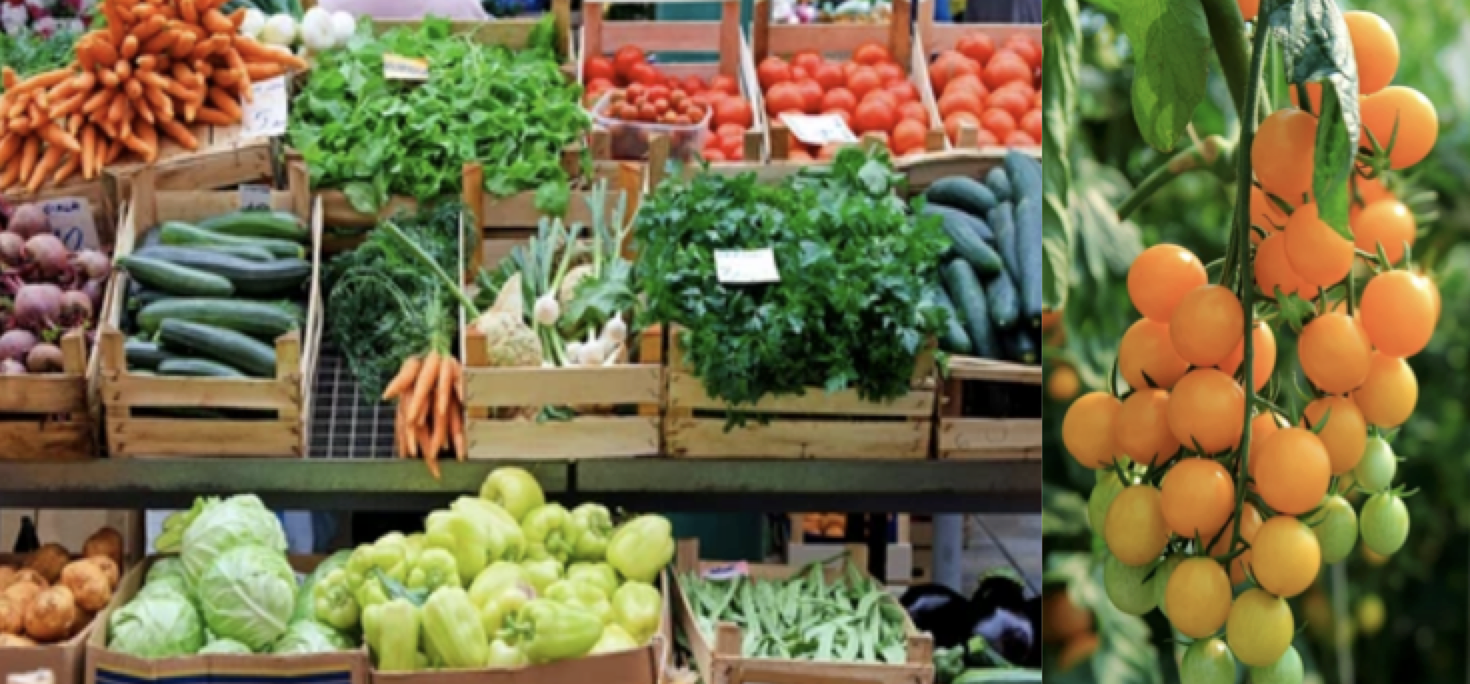 Why do people like to grow vegetables? There are so many different reasons. Many people find gardening to be a source of relaxation, a way to enjoy their backyards. Some people like growing their own produce because they like to know where their food comes from and whether it has been sprayed with herbicides or is organic. Others appreciate being less dependent on grocery stores with their rising prices and limited inventory. Then there are folks who welcome variety and trying new foods. Finally, the satisfaction obtained from eating and sharing fresh produce with friends and neighbors, and giving away the surplus is hard to beat. In this mini-guide, we’ll take you through the key steps to growing vegetables in your own yard. Selecting a site It begins with selecting a site. Some factors to consider include: Getting enough sun Since vegetable plants need at least six hours of direct sunlight every day, selecting a sunny area is crucial. If you have a sun-filled patch in your yard, you can plant rows of vegetables in an in-ground garden or in containers. Plant the vegetables away from the shade cast by buildings, fences, and shrubs. Beans, tomatoes, peppers, eggplants and melons — among the plants that flower and set fruit — need more sunlight. Some vegetables tolerate shade better than others. These include broccoli, kale, cabbage, collards, lettuce, parsley and spinach — vegetables that produce edible stems and leaves. Plants with edible roots, such as beets, carrots, radishes and turnips also tolerate shade.
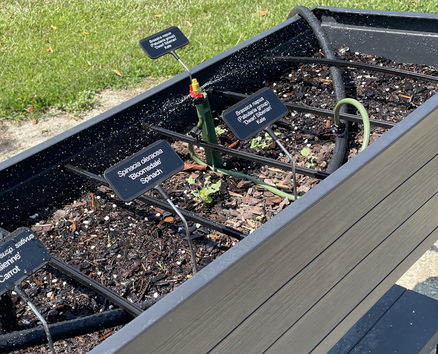
https://www.ncagr.gov/divisions/agronomic-services/soil-testing Avoid using garden soil for container gardening because garden soil is heavier and can quickly become compacted and waterlogged in containers. Garden centers have soil specifically formulated for containers. The New Demonstration Vegetable Garden at the Pitt County Arboretum The new demonstration vegetable garden is to the left of the Pitt County Agricultural Center as you come in, and then around the side.
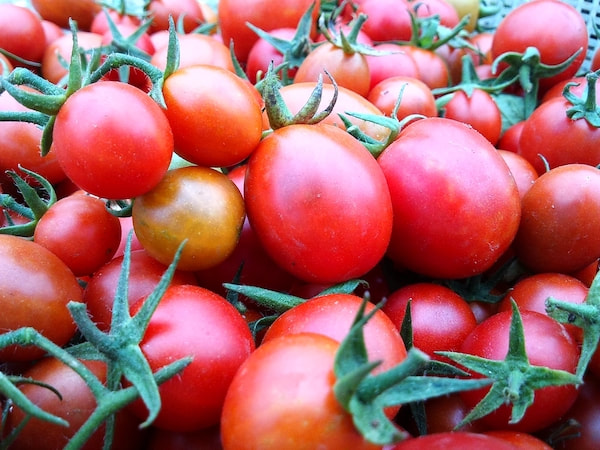
 Step 3: Selecting what to grow ✓ Choose what you and your family like to eat. ✓ Don’t overplant. You want growing vegetables to be a pleasurable activity, not something that becomes a chore because you’ve planted way too much. ✓ Consider what’s readily available locally. For instance, it’s easy to find red tomatoes, but not heritage tomatoes, and you will pay a premium for these. A basket of orange cherry tomatoes will set you back a small fortune in the grocery store. Or you buy one plant and harvest hundreds of tomatoes over months. ✓ You can buy common herbs or grow them for pennies from seeds. In addition to being inexpensive, the quality and taste of what you grow may also be superior to what you can purchase. The decision was made to plant vegetables that are commonly grown and consumed in Eastern North Carolina in the demonstration garden. These include fall crops such as carrot, spinach, kale, and lettuce seeds.
Stagger your planting Plant seeds at different times so that you will have a supply of lettuce or other produce through the season rather than too large a supply at one point. Consider that some crops mature quickly (e.g. radishes and bush beans), while others take many more days to mature (e.g. tomatoes, peppers).
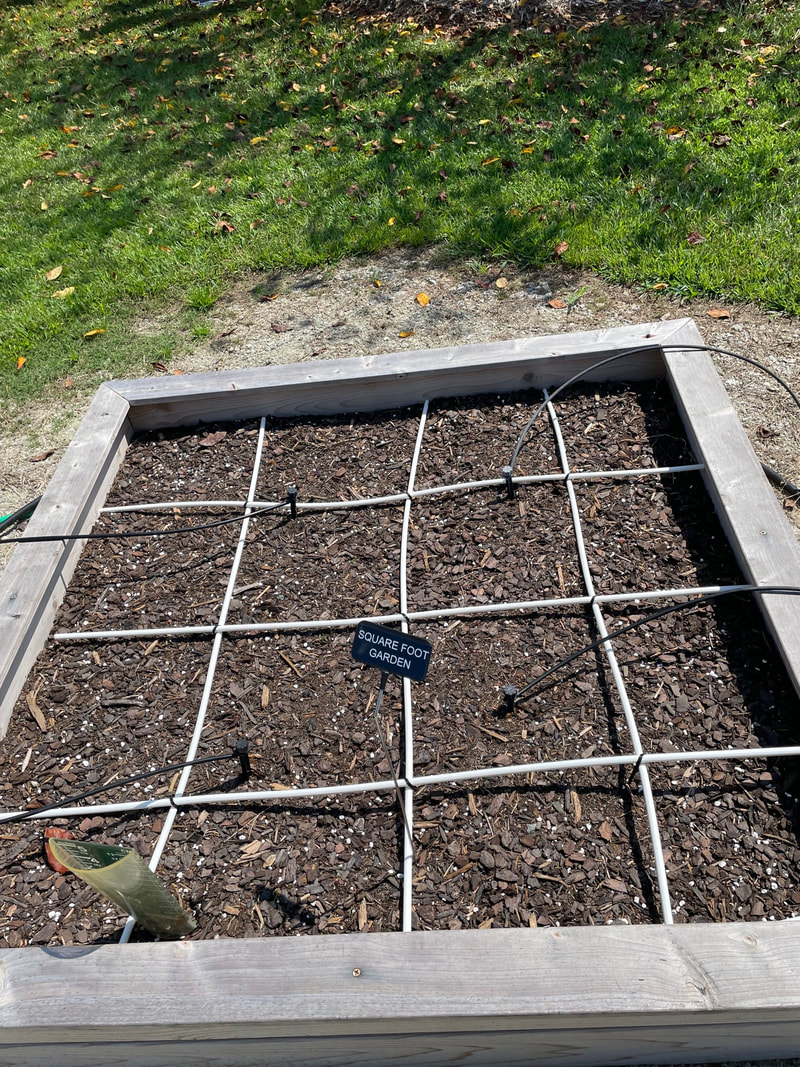
✓ In addition to being a natural culinary pairing, basil protects tomato plants by repelling thrips and disorienting moths, which lay tomato hornworms. Basil also attracts bees. Parsley also attracts beneficial insects to protect and pollinate tomatoes. ✓ Caterpillars enjoy kale, cabbage, and broccoli. But growing nasturtiums – edible flowers – close to these vegetables will keep caterpillars out. ✓ Most insects in the garden are beneficial insects, helping with pollination. Some plants attract beneficial insects. For example, borage attracts pollinating insects to boost flowering crop plants such as tomatoes and squash. Eastern North Carolina is fortunate to have a long growing season, with the opportunity to plant thousands of fruits, vegetables, and herbs. Many sources of information are readily available for learning how to grow a home vegetable garden. Here are just a few: Information Sources: Agronomic Division. Soil Testing: Enhancing land productivity, nutrient use efficiency & environmental quality. 2008. Raleigh, NC: N.D. Department of Agriculture and Consumer Services. Accessed at https://www.ncagr.gov/divisions/agronomic-services/soil-testing Shawn Banks and Lucy Bradley. 2023. Vegetable Gardening: A Beginner’s Guide. NC State Extension, available at https://content.ces.ncsu.edu/home-vegetable-gardening-a-quick-reference-guide Farmer’s Almanac. Vegetable Gardening for Beginners: The Complete Guide. At https://www.almanac.com/vegetable-gardening-for-beginners See the online planting instructions, gardening calendars, as well as guides for how to design a vegetable garden. Michael Fine. Growing Vegetables in Central North Carolina. March 24, 2022. Zoom presentation sponsored by the North Carolina Extension Master Gardener Volunteer Association (NCEMGVA). https://growforit.ces.ncsu.edu/activities-for-kids/square-foot-gardening/ Kathleen Moore & Lucy K. Bradley, editors. “Chapter 16: Vegetable Gardening,” in North Carolina Extension Gardener Handbook. 2018. North Carolina State University. This mini-guide was written by Susann Camus, an Extension Master Gardener Volunteer (EMGV) with Pitt County, with assistance from Matt Stevens, the Pitt County Extension Director and Horticulture Agent, and Pitt County Demonstration Vegetable Garden EMGV team members, Alta Andrews, Dell Enecks, Tommy McDaniel, and Diane Strathy.
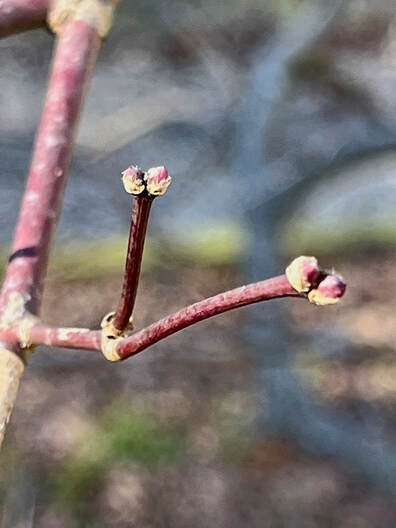
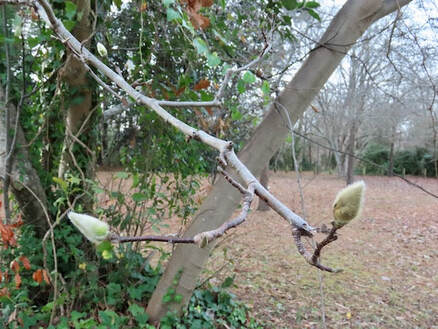
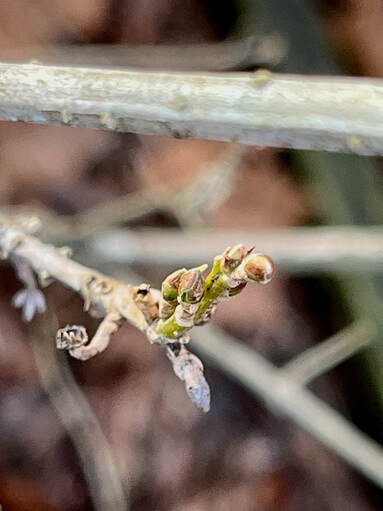
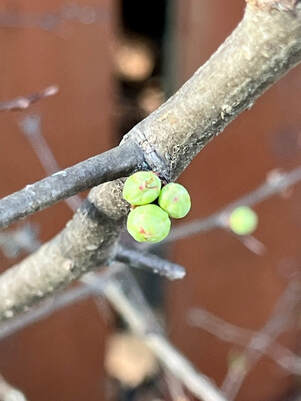
Published on the Pitt County Arboretum website in January 2024. Story by Joanne K., Pitt County Extension Master Gardener Volunteer Although the recent cold snap says winter, signs of spring are everywhere in eastern North Carolina as evidenced by the swelling buds of many trees and woody shrubs. But you might wonder, what is a bud and how does it know to start growing? A bud is an undeveloped shoot from which new leaves or flower parts arise. In summer while the trees and shrubs are covered with leaves, next year's flower and leaf buds are already forming in the axil of the leaves (the small angle between the plant's stem and the leaf attachment).
Take a stroll around your yard and neighborhood to look closely at the trees and shrubs. Spend a few minutes along the Walking Trail in the Arboretum. You'll marvel at the early signs of life you'll see in the buds.
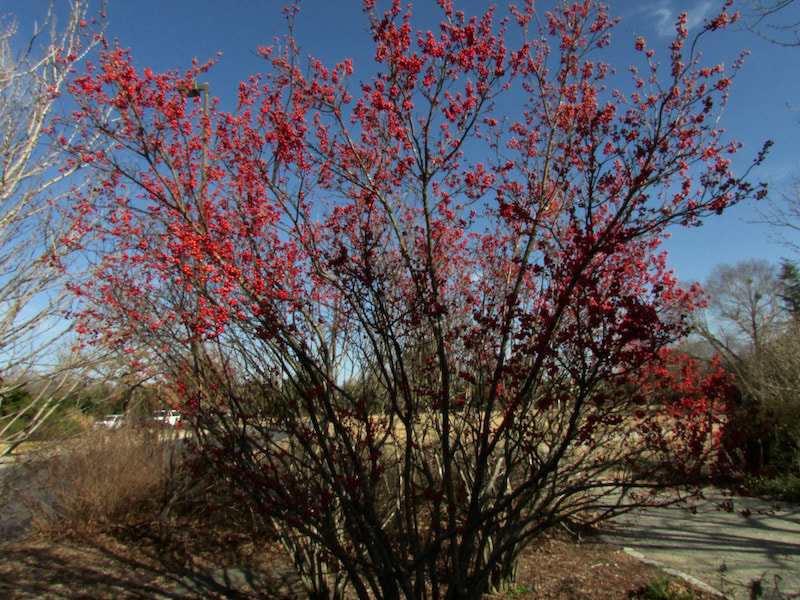
All pictures by Joanne K. By Joanne K., Pitt County Arboretum Extension Master Gardener Volunteer With the leaves on the ground and winter upon us, this is a great time to see the bones of your garden to determine if changes and/or additions are needed. Perhaps a shrub didn't live up to expectations or has outgrown its space. Maybe a tree has been damaged beyond recovery. Or your plants are fine, but you'd like to add more color and variety to your landscape in order to attract more birds.
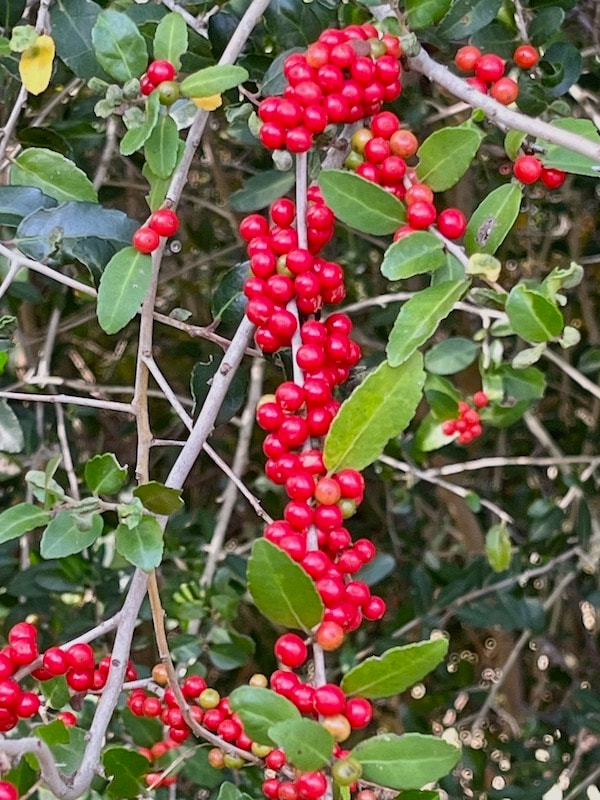
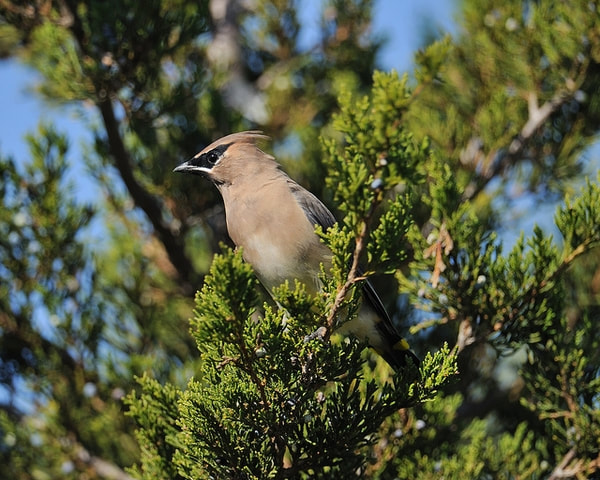
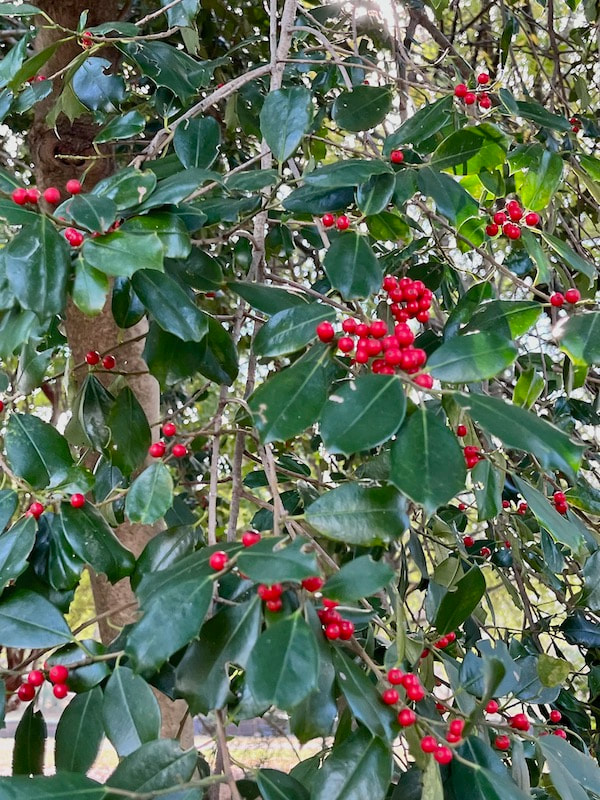
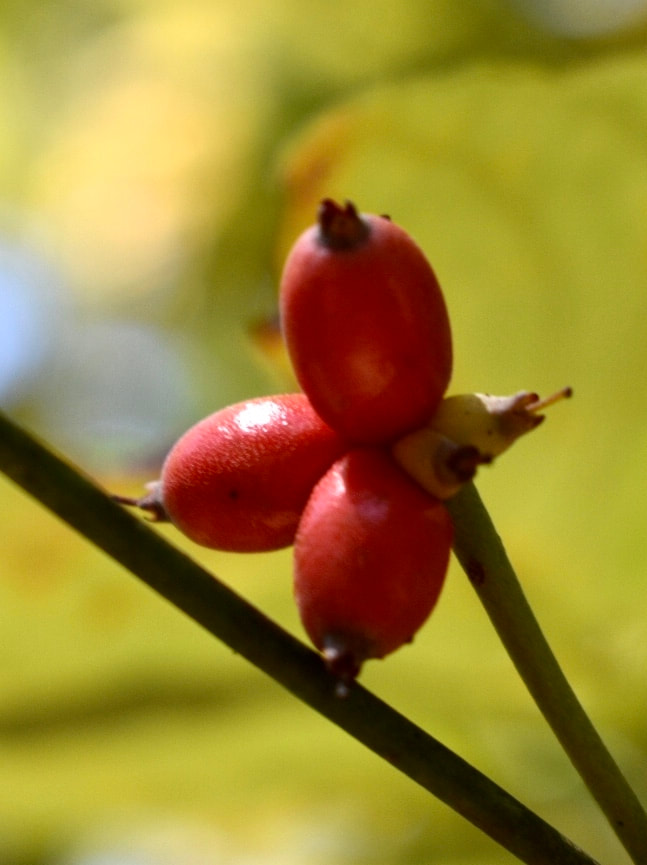
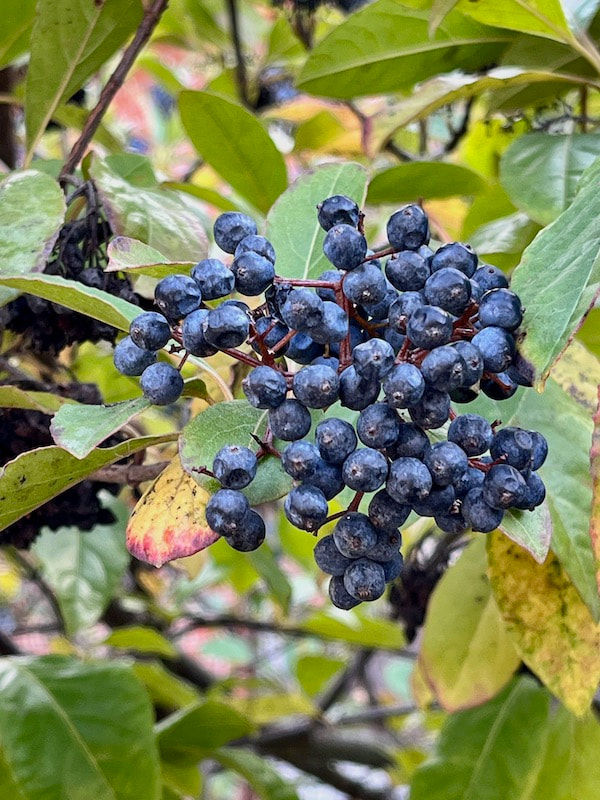
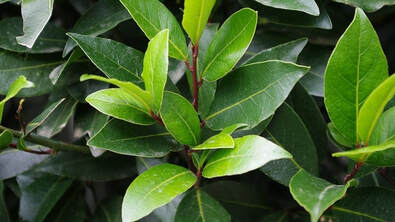
Other natives, such as Dogwood (Cornus florida), Possumhaw viburnum (Viburnum nudum), Carolina Cherry Laurel (Prunus caroliniana), Hawthorne (Crataegus viridis), Eastern Red Cedar (Juniperus virginiana), Southern Magnolia (Magnolia grandiflora), and Southern Wax Myrtle (Myrica cerifera) also attract a variety of birds as their berries have a high fat, carbohydrate, and nutrient content.
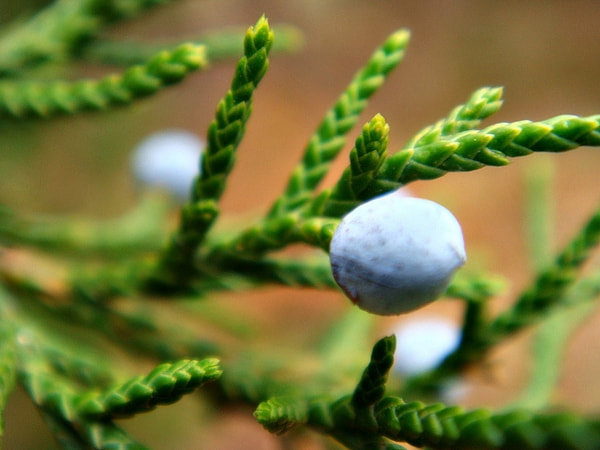 8. Eastern Red Cedar berry (Juniperus-virginiana) Enjoy the year-round beauty of native plants and the colorful array of birds they attract by adding these plants to your garden.
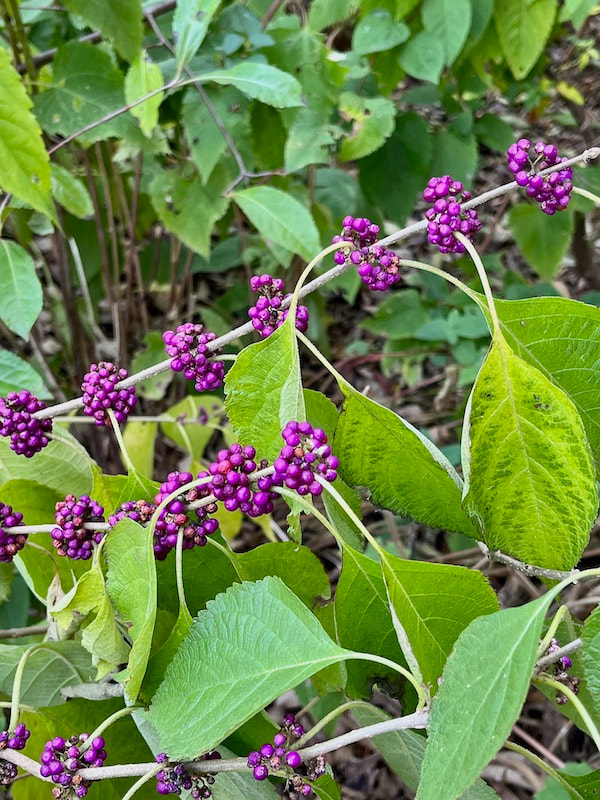
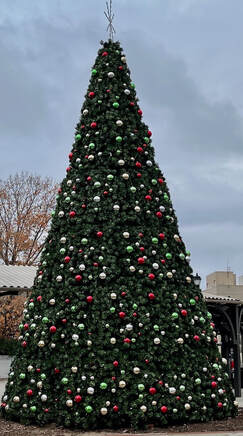
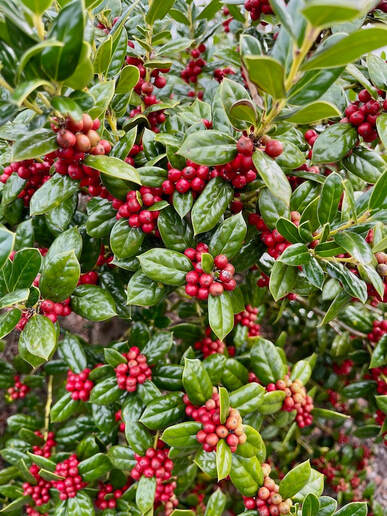
For information about specific native plants, go to https://plants.ces.ncsu.edu/ For information about the plants birds prefer and when these plants produce berries, go to: https://content.ces.ncsu.edu/managing-backyards-and-other-urban-habitats-for-birds For information on landscaping for wildlife, go to https://content.ces.ncsu.edu/landscaping-for-wildlife-with-native-plants Photos: 1. Yaupon Holly (Ilex vomitoria)—Joanne K. 2. Winterberry Holly—Female (Ilex serrata x verticillata 'Sparkleberry')—Joanne K. 3. Native Holly (Ilex opaca)—Joanne K. 4. Beautyberry Shrub (Callicarpa americana)—Joanne K. 5. Berry—Dogwood (Cornus florida) Fruit-Fall-Moore Co., NC Cathy DeWitt CC BY-NC-ND 4.0 6. Possumhaw Viburnum (Viburnum nudum)—Joanne K.7 7. Cedar waxwing in Eastern Red Cedar (Juniperus virginiana) Janet and Phil CC BY-NC-ND 2.0 8. Berry—Eastern Red Cedar (Juniperus virginiana) CameliaTWU CC BY-NC-ND 2.0 By Joanne K., Pitt County Extension Master Gardener Volunteer With the holiday season upon us, evergreens are decorating everything from churches and front doors to streetlights and car bumpers! These greens appear in many forms, including trees, wreaths, and garlands.
Vikings used evergreen decorations to ward off evil spirits associated with the winter solstice. Fir trees served as New Year's decorations for the Romans.
Holly (Ilex) was considered a sacred plant by Druids, for whom it symbolized fertility, and eternal life. Romans used it to decorate during Saturnalia, the feast of Saturn, the god of agriculture and harvest. For Christians, holly came to symbolize Jesus Christ, with the berries representing his blood, and the thorns the crown that was placed on his head before he died.
Ivy (Hedera helix) is another green used by the ancients to represent eternal life and the return of spring. Romans associated it with Bacchus, the good of wine and intoxication. In some cultures, it symbolized marriage. For some it represented prosperity and fortune, which early Christians saw as a sign to help those less fortunate. Ivy and holly are frequently used together to make wreaths and other Christmas decorations.
Although the history of how Christmas and evergreens came together may be open to different interpretations, it's a beautiful tradition celebrating the spirit of the season.
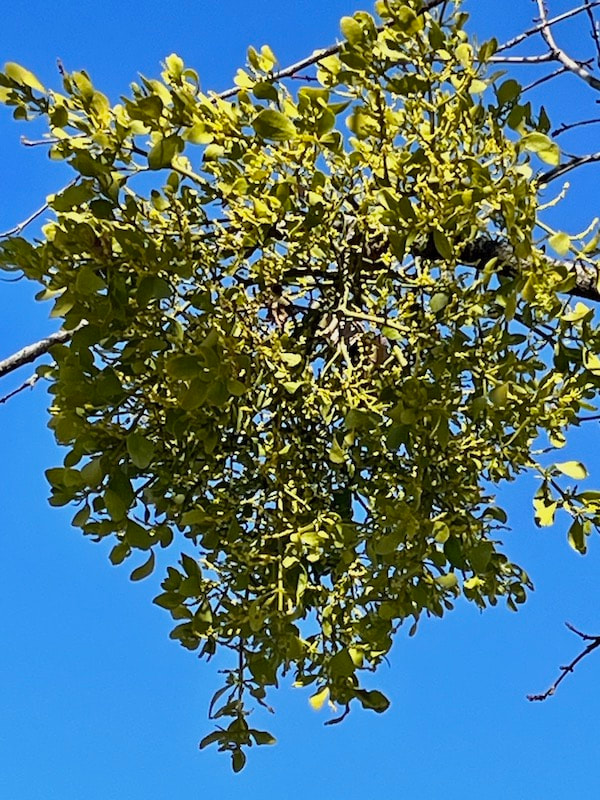
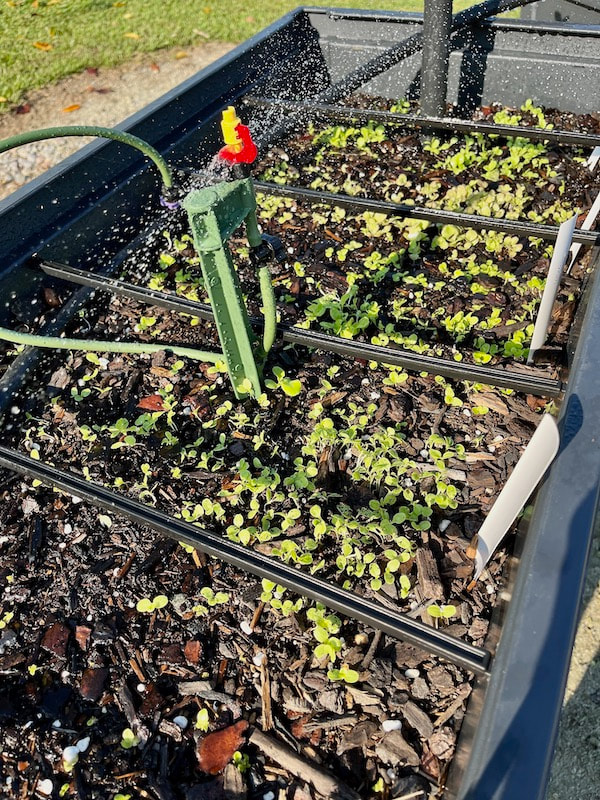
Photo Credits Christmas Tree (Pinaceae family)—Joanne K. Christmas Wreath (Pinaceae family)—Joanne K. Holly (Ilex)—Joanne K. Ivy (Hedera helix)—Joanne K. Bay Laurel (Taurus nobilis)—Leaves, Twinning Valley Nurseries CC BY-NC-ND 2.0 Mistletoe (Phoradendron serotinum)—Joanne K. By Joanne K., with contributions from Diane S., Dell E., Tommy M., and Alta A., Pitt County Extension Master Gardener Volunteers Gardens are always changing, and the Arboretum gardens are no exception. Plants die, outgrow their space, fail to thrive, or a garden just needs to be rejuvenated. A case in point is our new vegetable garden, the latest work in progress! When the irrigation system no longer functioned in the old vegetable garden adjacent to the Children's Garden, the vegetable garden team, in consultation with the Horticultural Extension Agent, decided to create a new one in an area west of the county auditorium.
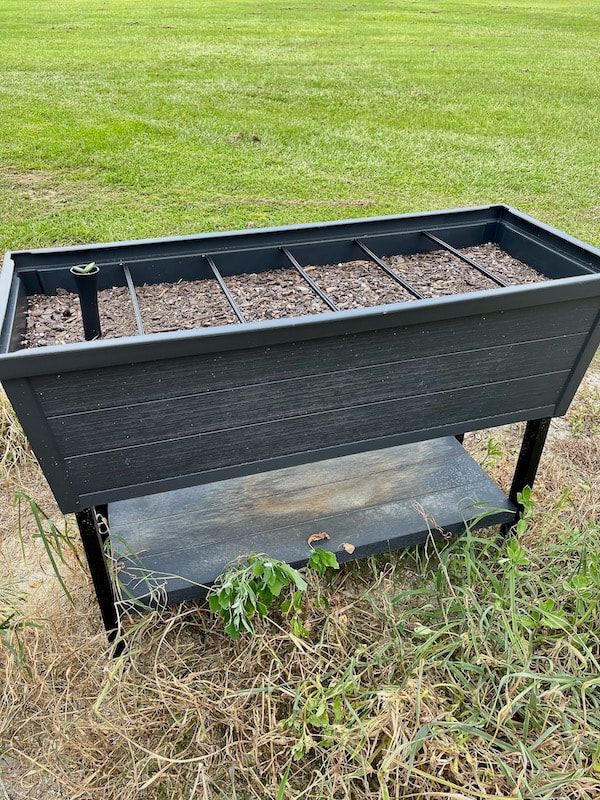
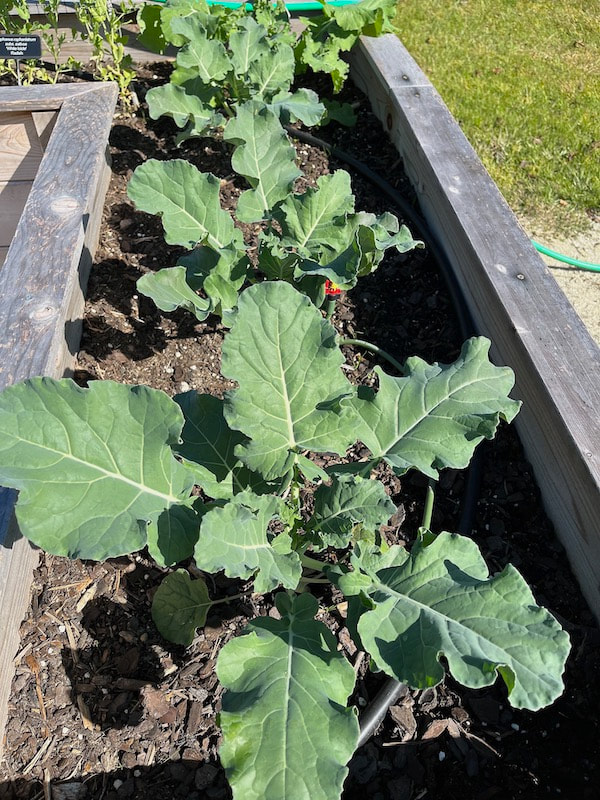
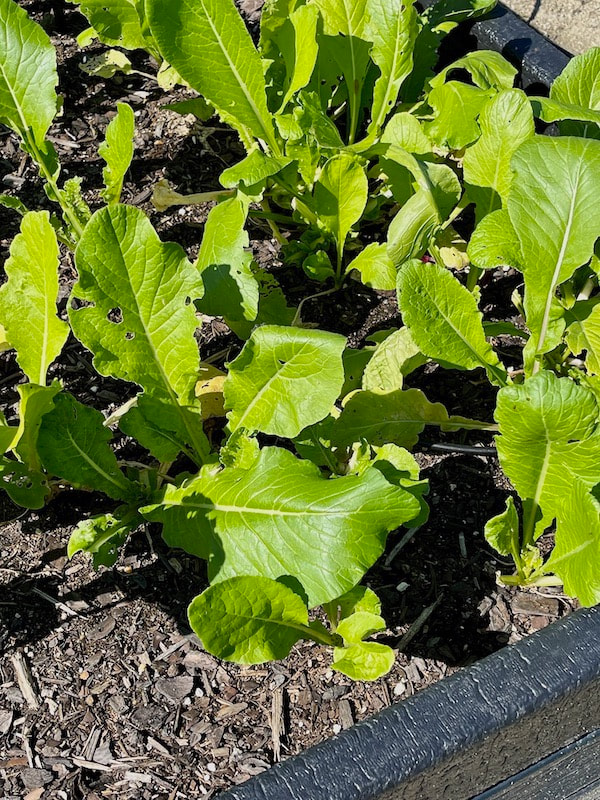
The beds were filled with a mix of composted cow manure, aged pine bark fines, perlite, dolomitic lime, and sand, which was bought in bulk. This formulation provides excellent drainage for vegetable or flower gardening. Fall lettuces are currently growing in the new beds, along with radishes, kale, beets, carrots, broccoli, and peas. All of the harvest will be donated.
Depending on the size of the beds, anything can be grown in them. In fact, there are even compact varieties of tomato and cucumber plants that do well in the smallest of spaces.
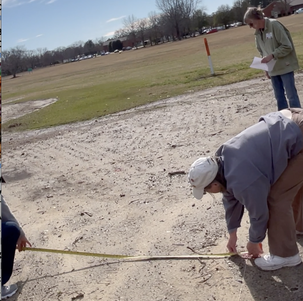
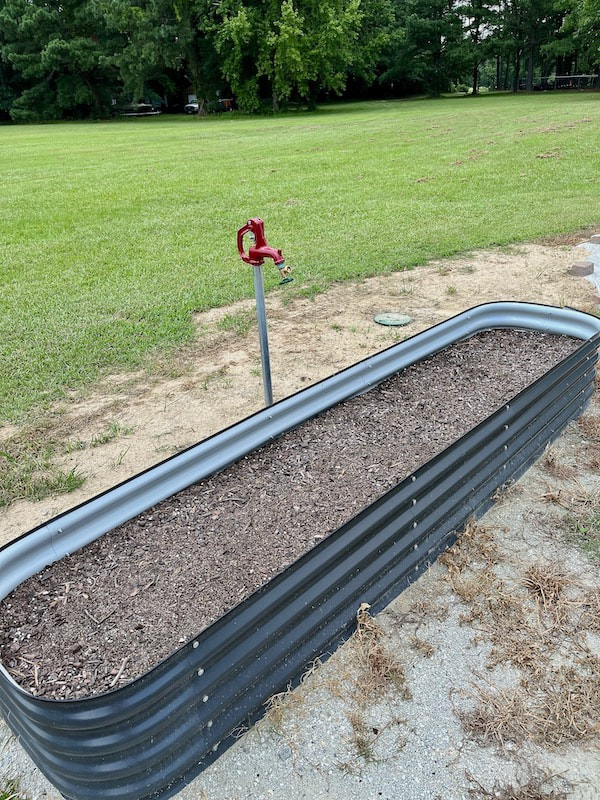
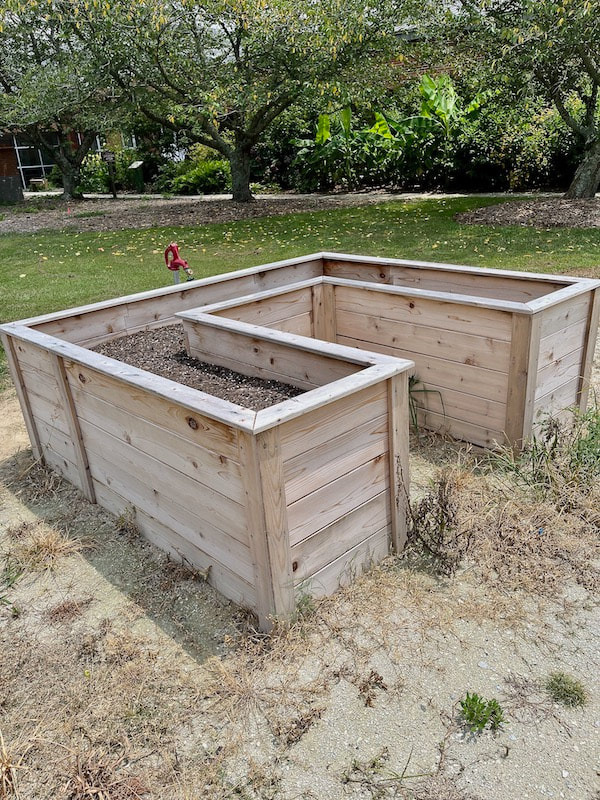
Future plans include an in-ground plot as well as an arbor and a space to showcase more portable planting ideas, such as grow bags. To show that vegetable gardens can be attractive, a border will be added around the garden with a seating area in the center. The team hopes to do educational workshops when construction is complete. The team purchased their beds locally and online. Two elevated planters are plastic, and the low elliptical planter is metal. The square bed and the double-height u-shaped bed are made of cedar, the recommended wood for these products. Small-space gardening has become very popular, and it is getting easier to find kits and pre-made beds, which are available from many big box stores and online retailers. All but the recycled plastic bed in the garden required assembly. The team had a little help with the u-shaped planter. But other than that, it has been all-girl power! Pitt County Soil and Water Conservation staff provided site preparation. They used their machinery to dig up the turf, level the ground, and install crush-and-run to make a nice walking/wheeling surface. For the home gardener, some sources recommend removing the turf from under the beds, but team members know people who have placed their beds right on top of existing grass with no problems. For information on creating your own raised beds, go to the North Carolina Community Gardens Handbook at https://content.ces.ncsu.edu/collard-greens-and-common-ground-a-north-carolina-community-food-gardening-handbook/soil-plots-and-planters. |