 Calling all young gardeners to-be! Determining your soil texture is an important part of establishing your garden. The feel method for soil texture provides a quick and easy way to get an idea of your soil type. To start, place approximately 25g of dry soil in your palm. Add water and knead the soil to break down aggregates until the soil is moldable.
Does the soil remain in a ball when squeezed? If not, consider adding more soil or continuing to knead it if it is still too wet. If it still remains too loose, the soil may be sand. If the soil remains in a ball when squeezed, take it between the thumb and forefinger and gently push the soil, squeezing it upwards into a ribbon. Allow the ribbon to emerge and extend until breaking under its own weight. If the soil does not form a ribbon, it may be sandy loam. If it does, then excessively wet a small pinch of the soil and rub with your forefinger. If the soil makes a weak ribbon less than 2.5 cm long and feels very gritty, then it may be sandy loam. If it feels very smooth, then it may be silt loam. If neither girttiness or smoothness predominates, then the soil may be loam. If the soil makes a medium ribbon 2.5 - 5 cm long before breaking and feels very gritty, then it may be sandy clay loam. If the soil feels very smooth, it may be silty clay loam. If the soil feels neither predominately gritty or smooth, then it may be clay loam. If the soil makes a strong ribbon 5cm or longer before breaking and feels very gritty, then it may be sandy clay. If it feels very smooth, it may be silty clay. If the soil feels neither gritty or smooth, then the soil may be clay. This quick and easy test is a fun, hands-on experiment with soil. The results may vary with the gardener and depend on variations of saturation and soil sample. Consider trying this with children or young gardeners who aren’t afraid of getting their hands a little dirty! written by: Katie Winslow - Extension Intern
1 Comment
 A new plant sale corner is featured in the covered area of the butterfly garden! This corner advertises plants from the Arboretum gardens and from the personal gardens of our Master Gardener volunteers. Each plant comes with a label detailing the plant name and qualities, along with a QR code. The QR code leads to the Extension Gardener Plant Toolbox website for that specific plant.
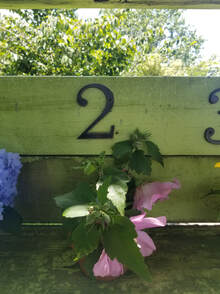
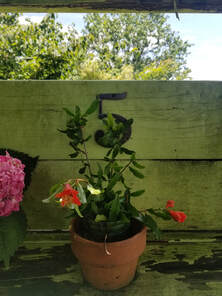
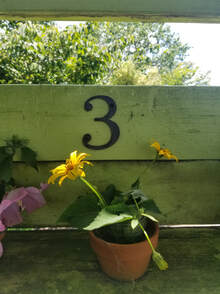
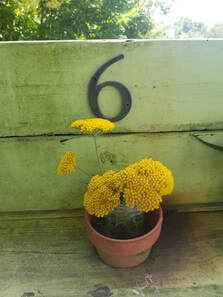
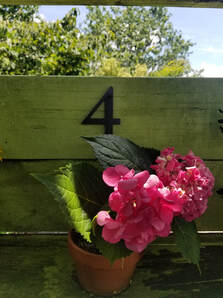
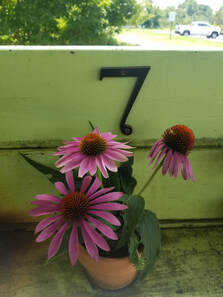
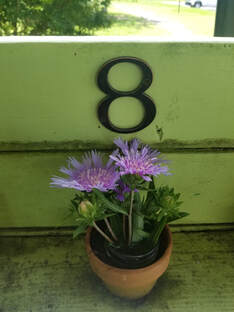
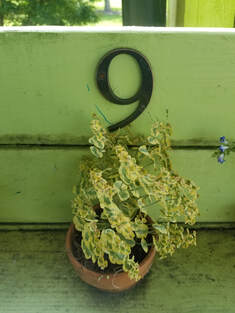
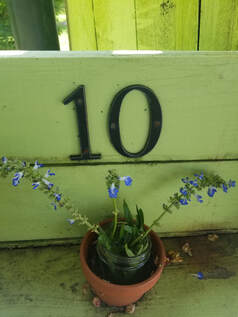
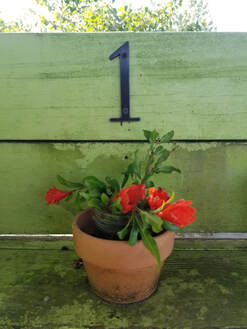
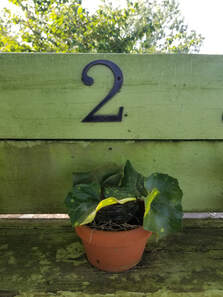
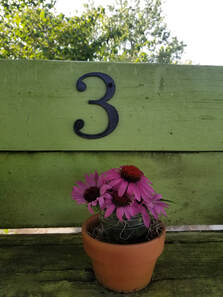
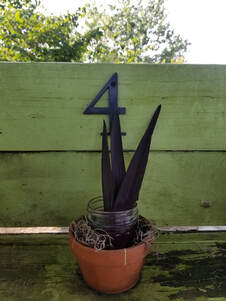
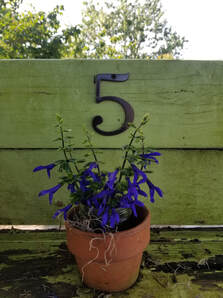
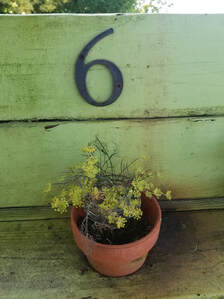
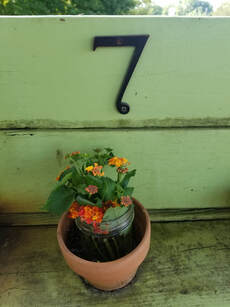
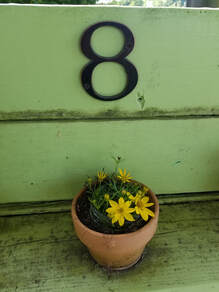
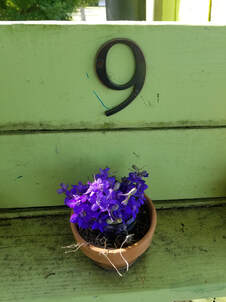
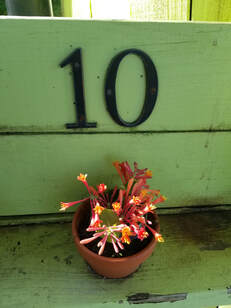
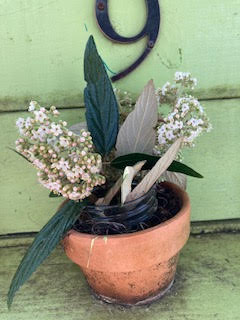
The Extension Gardener Plant Toolbox is a valuable tool for both Extension agents and the curious public. This website offers research based information on a variety of plants that can be grown in any North Carolina garden. Pay particular attention to details such as lifecycle, light conditions, and maintenance level. The plant sale accepts donations in a black donation box located next to the sale corner. Each plant has a suggested donation located on the label. Donations collected go towards supporting the Master Gardener program and their continued work in the Arboretum. Interested in getting more involved with the Arboretum and Master Gardener program? Check out our support page and learn more about volunteering! Written By: Katie Winslow - Extension Intern  1. Walking Garden: Hydrangea macrophylla / Big Leaf Hydrangea 2. Butterfly Garden: Hibiscus syriacus 'Aphrodite' / Rose of Sharon 3. Wet Site: Heliopsis helianthoides / Oxeye Sunflower 4. Wet Site: Hydrangea macrophylla / Pink Bigleaf Hydrangea 5. Fruit Garden: Punica granatum / Pomegranate 6. Children's Garden: Achillea 'Moonshine' yarrow 7. Perennial Garden: Echinacea 'Evan Saul' / Big Sky Sundown Coneflower 8. Perennial Garden: Stokesia laevis 'Blue Danube' / Stokes Aster 9. Container Garden: Euphorbia martinii 'Ascot Rainbow' / Martin's Spurge 10. Herb Garden: Salvia uliginosa / Bog Sage
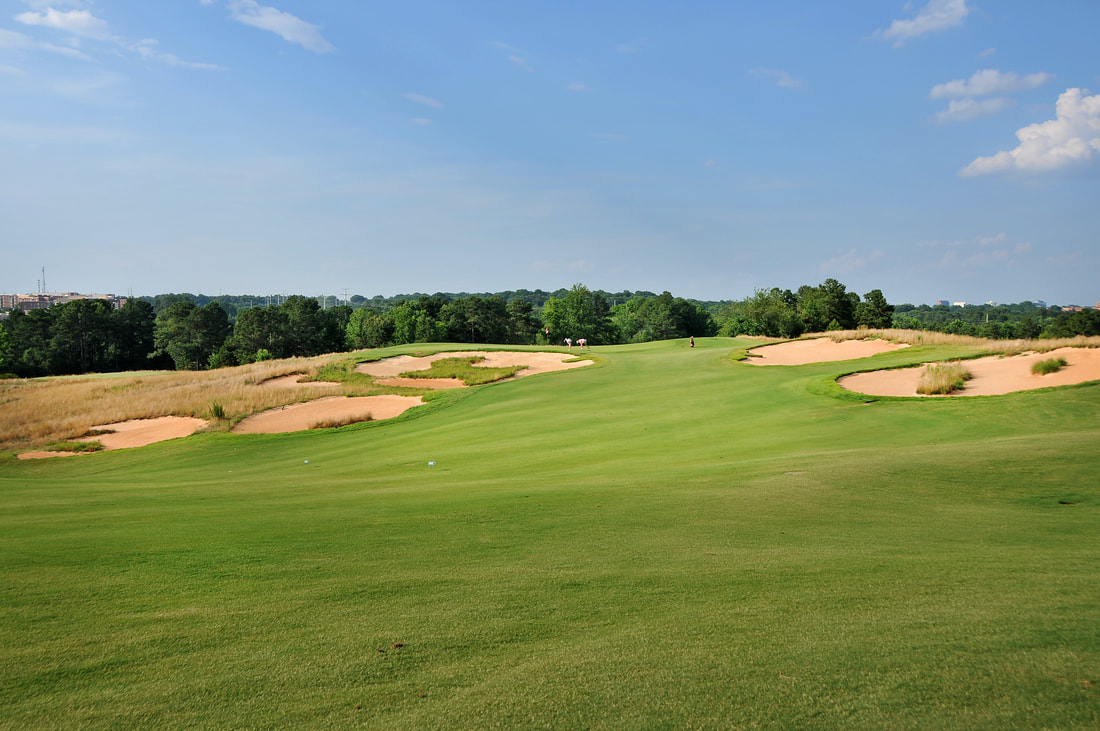
 Low maintenance gardening does not mean no maintenance gardening - careful planning, effort, and well designed time are still a must in any garden space. More time dedicated to this garden up front though will pay off in its relatively little need for attention later on. Finding the right combination of colorful foliage, well timed flowering habits, and beneficial ground coverage is the key to creating your own low maintenance garden.
First, identify the areas in your garden or landscape that you spend the most time on. Are these areas worth the upkeep, or would you rather redesign them? Evaluating space is a key initial step in a low maintenance garden. Design around lawn or turf areas, simple spaces are easier to mow. Consider utilizing walkways, paths, and patio spaces for easy access to garden areas and to reduce the space needed for gardening. Minimum maintenance materials such as concrete, brick, or flagstone keep borders well-defined and decrease upkeep time. Invest early on in issues that could be long term. Drainage, for example, is important to evaluate at the start of your low maintenance garden. Adequate drainage is essential for proper soil aeration and to keep water in a usable form for plants. If water drains in less than 5 minutes, the soil is too sandy; if it takes more than 15 minutes, the soil has too much clay. Tube or tile drainage are popular methods for piping out excess water. Understanding your soil is another important early step. The most accurate way to determine your soil type is to have it tested professionally. A complete soil analysis will offer valuable information on how to improve your soil content to its optimal state. Your soil may need additives such as lime or sulfur. Soil amendments such as compost, peat, and well-rotted manure offer nutrients to condition soil. Please contact your Extension office for a professional soil test before adding nutrients to your garden soil. Lastly, select plants that will thrive in your low maintenance conditions. Ground covers such as Ivy, Hedera species, Wild Ginger, Asarum europaeum, and Japanese Spurge, Pachysandra terminalis, offer evergreen coverage that will thrive in shade areas. Other ground covers like Periwinkle, Vinca minor, Moss Phlox, Phlox subulata, and Snow-in-Summer, Cerastium tomentosum, offer seasonal flowering that varies from blue to pink to white. If incorporating trees, Crabapple, Malus species, Hornbeam, Carpinus betulus, and Dogwood, Cornus kousa, are excellent options. When planning for flowers, take the time to research which perennials and annuals grow well in both your zone and in the specific garden area you would like to cover. Perennials such as Peonies and Daylilies need full or part sun and would not do well in particularly shady or covered areas. Wildflower or meadow gardens are also an excellent choice for low maintenance areas. Wildflowers need little to no care once established and can survive in harsh or difficult climates and soil. When selecting seeds, look for 100% pure seed without any fill. The right combination will keep your garden flowering for months and benefit native pollinators and wildlife. Low maintenance gardens are a perfect option for gardeners on the go and those looking for a more casual experience. This style can impress even the most professional gardeners! Give yourself more time to enjoy your garden space by cutting down on the time required to cultivate your garden space!
 Cold (slow) compost pile featured on site at the arboretum. Cold (slow) compost pile featured on site at the arboretum. Compostable material makes up 28% of the solid waste generated in the United States. Gardeners should consider the benefits, to both their garden and waste management, in creating a compost pile! Many organic materials such as grass clippings, branches and twigs, and eggshells may be composted into a nutrient rich humus-like substance that may be incorporated into the natural soil.
Compost that is incorporated into the soil increases organic matter, root growth, moisture, and aeration. It can also be applied to the surface of soil to control weeds, reduce erosion, and stabilize the temperature of soil. In this controlled process, compost allows the decomposition and transformation of biodegradable material. There are two main types of composting - Hot (fast) composting and Cold (slow) composting. Hot composting requires a balance of organic materials, moisture, and oxygen to support microorganisms. This pile will reach temperatures of 140° to 150°F! This works to kill weed seeds and pathogens. In general, a ratio of 2 to 1 mix of “browns” (carbonaceous materials) and “greens” (nitrogenous materials) will provide the best results. This pile should be turned weekly and will take several months before producing the ideal compost to add to soil. This type of composting requires more time and energy, but yields quicker results. Cold composting is a much slower process. Generally, compostable scraps are added to a one-time or continuous pile and watered. The scraps are not turned and are allowed to decompose on their own over time. In about a year, rich compost will be available. This type of composting is better for the more casual experience and does not require much time or effort. No matter what kind of composting you decide to try, remember that decomposition is affected by the surface of materials, moisture, and the ventilation of the pile. Smaller particles break down faster, but rigid particles provide structure and add to ventilation. Approximately 40% to 60% moisture is needed to decompose, meaning that the pile should feel like a wrung-out sponge. Too much or too little moisture will slow decomposition. Piles with proper ventilation produce little or no odor. If hot composting, turning the pile will aid in ventilation. If cold composting, be sure to place your pile in an area or bin that will allow air flow. Happy composting! Written by: Katie Winslow - Extension Intern
As we approach summer, it is important to remember that your lawn needs 1 inch of water every week. If rainfall does not provide this, you will need to add water or supplement water during dry spells. Sandy soil can require up to ½ inch of water every third day.
Centipedegrass should be mowed to 1 inch and should not be taller than 1 ½ inch. In mid June, fertilize with ½ pound of nitrogen per 1,000 square feet. High potassium fertilizers like 5-5-15 or 8-8-24 work best. It is recommended to have your soil tested every 3 years to provide the most up to date information on soil composition and needed supplements, such as phosphorus. June through August is the perfect time to apply postemergence herbicides as needed to control weeds such as knotweed, spurge, and lespedeza. Centipedegrass can be sensitive to certain herbicides though, like 2, 4-D, and MSMA, so be careful and follow label directions closely. If the lawn is suffering from drought stress or weeds are not actively growing, do not apply herbicides. Check for and control any white grubs and nematode damage. Soil testing is recommended for those suspecting nematode damage. From September through November, raise the mowing height to 1 ½ inches several weeks before the first expected hard frost. For Pitt county, the average first frost date is November 4th. Fertilize with 1 pound of potassium per 1,000 square feet 4 to 6 weeks before the first frost using 1.6 pounds of muriate of potash or 2 pounds of potassium sulfate. Continue to water the lawn until it browns. This means that the lawn has gone dormant and only requires water to keep the soil from becoming powder-dry. December through February requires little care of your lawn. Do not fertilize centipedegrass at this time. It can be helpful to remove lawn debris as it builds up, but never burn off centipedegrass to remove excessive debris. Broadleaf herbicides can be applied at this time as necessary to control chickweed and henbit. Herbicides like atrazine or simazine can be used to control annual bluegrass and winter broadleaf weeds. Other things to look out for in your centipedegrass lawns are ground pearls, appearing as circular dead areas with only weeds growing in the center, and fairy rings, appearing as circular green or dead areas that continue to enlarge for several years. Mismanagement of herbicides can cause similar issues and may require a consultation with your Cooperative Extension agent. Remember that it can take up to 3 years to establish a new lawn! Centipedegrass is well growing turf but it does not tolerate traffic, compaction, high-phosphorus soils, low-potassium soils, high pH, excessive thatch, drought, or heavy shade. If this grass continues to die in a certain location, that area may be better fit for a different species. Written by: Katie Winslow - Extension Intern 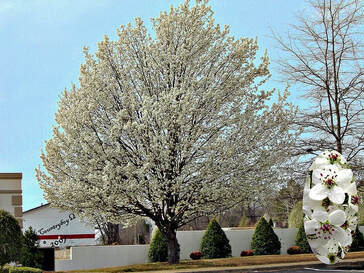 As spring begins to slowly bloom all around us, the white flowers of the Bradford pear become a common sight. For years, the Bradford pear has been seen as an iconic Southern tree (mostly because they were planted everywhere). They’ve become a popular choice in landscaping because of their rapid growth and abundant blooming, however, not all that blooms is beautiful (to paraphrase). These well-known trees branch from a single point and bear extremely weak wood, making them especially vulnerable in storms. The stinky scent of their flowers and dense growth that often shades out other plantings is yet another reason to look elsewhere for a source of beautiful spring blooms.
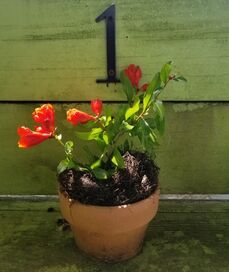
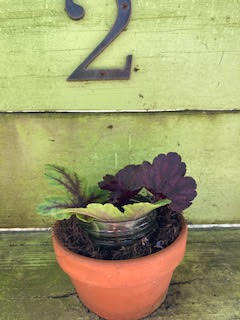
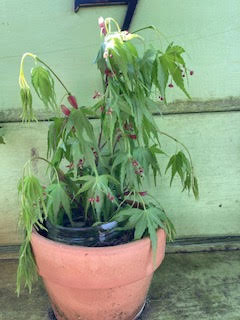
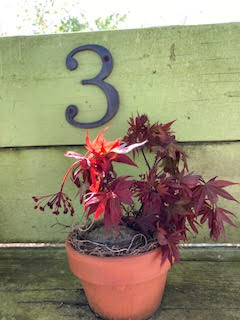
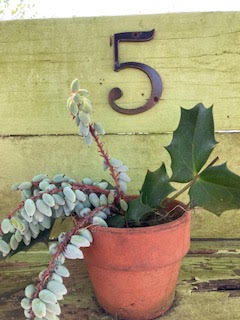
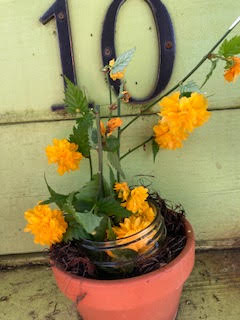
The Bradford pear is a cultivar of the Callery pear, Pyrus calleryana, introduced from China. It generally cross-pollinates with other Callery pear varieties as it cannot reproduce with itself or other ‘Bradford’ trees. These hybrid trees are invasive and can spread rapidly when fruit is eaten by birds and spread to other habitats. Because they are some of the earliest trees to leaf out and flower in the spring they can often outcompete native plants. Some quick identification hints include scalloped leaves that are dark green, shiny and ovate, white flowers in very early spring, and its pyramidal growth habit. So, we’ve told you what NOT to plant...now what? Here are a couple of native trees and shrubs that provide beautiful blooms, but are not invasive to our natural areas: American Plum, Prunus Americana, is a small, deciduous, single trunk tree or multi-stemmed shrub. As a tree, it typically grows 10-12 feet tall with a broad, spreading crown. As a shrub, it suckers freely and can form dense growth. As it blooms and early spring and also features white flowers, it makes an excellent alternative to the Bradford pear. Furthermore, it provides habitat for wildlife and attracts many different pollinators. Flowering Dogwood, Cornus florida, is a small, deciduous, flowering tree that may grow 15 to 25 feet tall. The tree is best known for its abundant, showy white (occasionally pink) flowers that emerge in early spring. This tree also produces a cluster of red drupes that mature in the fall. The Dogwood flower is the state flower of North Carolina so you can easily find the tree planted throughout the state. It also makes for a wonderful habitat for wildlife and attracts many different pollinators. While, of course, the choice is yours, we hope that you give an extra thought to these suggestions before planting Bradford pears. Help us to preserve and protect our natural areas and habitats by choosing native plants! Written by: Hannah S. Smith - Horticulture Extension Agent  1. Mixed Border: Syringa 'Penda'/ Bloomerang Reblooming Lilac 2. Perennial border: Heuchera 'Tapestry" & 'Pretty Pistachio'/ Coral Bells 3. Behind AG Center: Acer palmatum "Twombly's Red Sentinel' / Japanese Maple 4. Small Fruits: Punica granatum/ Pomegranate 5. Walking Garden, row 3: Mahonia bealei/ Leatherleaf Mahonia 6. Walking Garden, row 2: Metasequoia glyptostroboides/ Dawn Redwood 7. Walking Garden, row 1: Acer palmatum 'Bloodgood' / Japanese Maple 8. Walking Garden, row 1: Prunus serrulata 'Kwanzan' / Kwanzan Cherry 9. Walking Garden, row 5: Viburnum 'Pragensa'/ Prague Viburnum 10. Walking Garden, row 2: Kerria japonica 'Plentiflora'
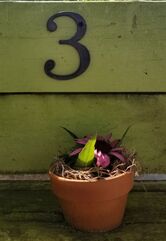
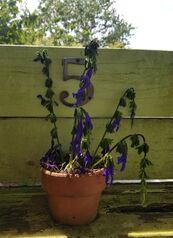
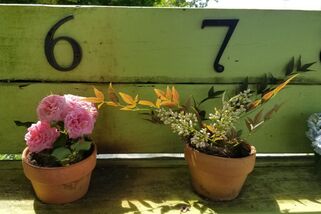
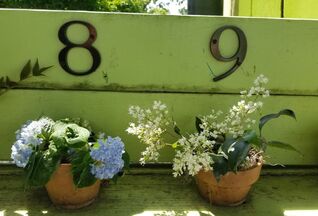
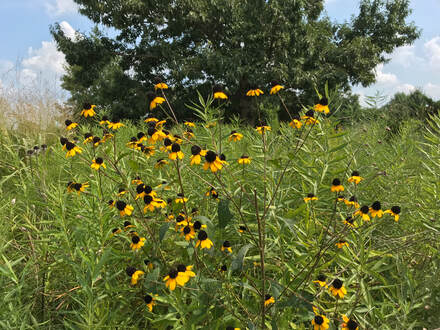
Each week, Extension Master Gardener volunteers choose a selection of what's blooming from throughout the Arboretum gardens. Come take a walk and see if you can find these beautiful for yourself!
Written by: Hannah S. Smith, Horticulture Extension Agent |